With the release of Anchore Enterprise 2.3 (built upon Anchore Engine v0.7.1), we are happy to announce a new feature of our reporting service: the ability to run scheduled reports.
Scheduled reporting is used to create custom queries, set a report to run on an automated schedule (or store the configuration for future use). Automatic notifications can be configured when a scheduled report is executed, providing insights for account-wide artifacts. The results are provided through a variety of formats in the Anchore Enterprise UI that include tabular, JSON, or CSV.
Scheduling a New Report
The first step in creating a new reporting schedule is to create a template to be used for the scheduled report. To begin, navigate to the View Reports tab. Under Creating a New Template, there is a drop-down that has several options and their descriptions; each can be used to generate reports. For this example, the template will be for Images with Critical Vulnerabilities.
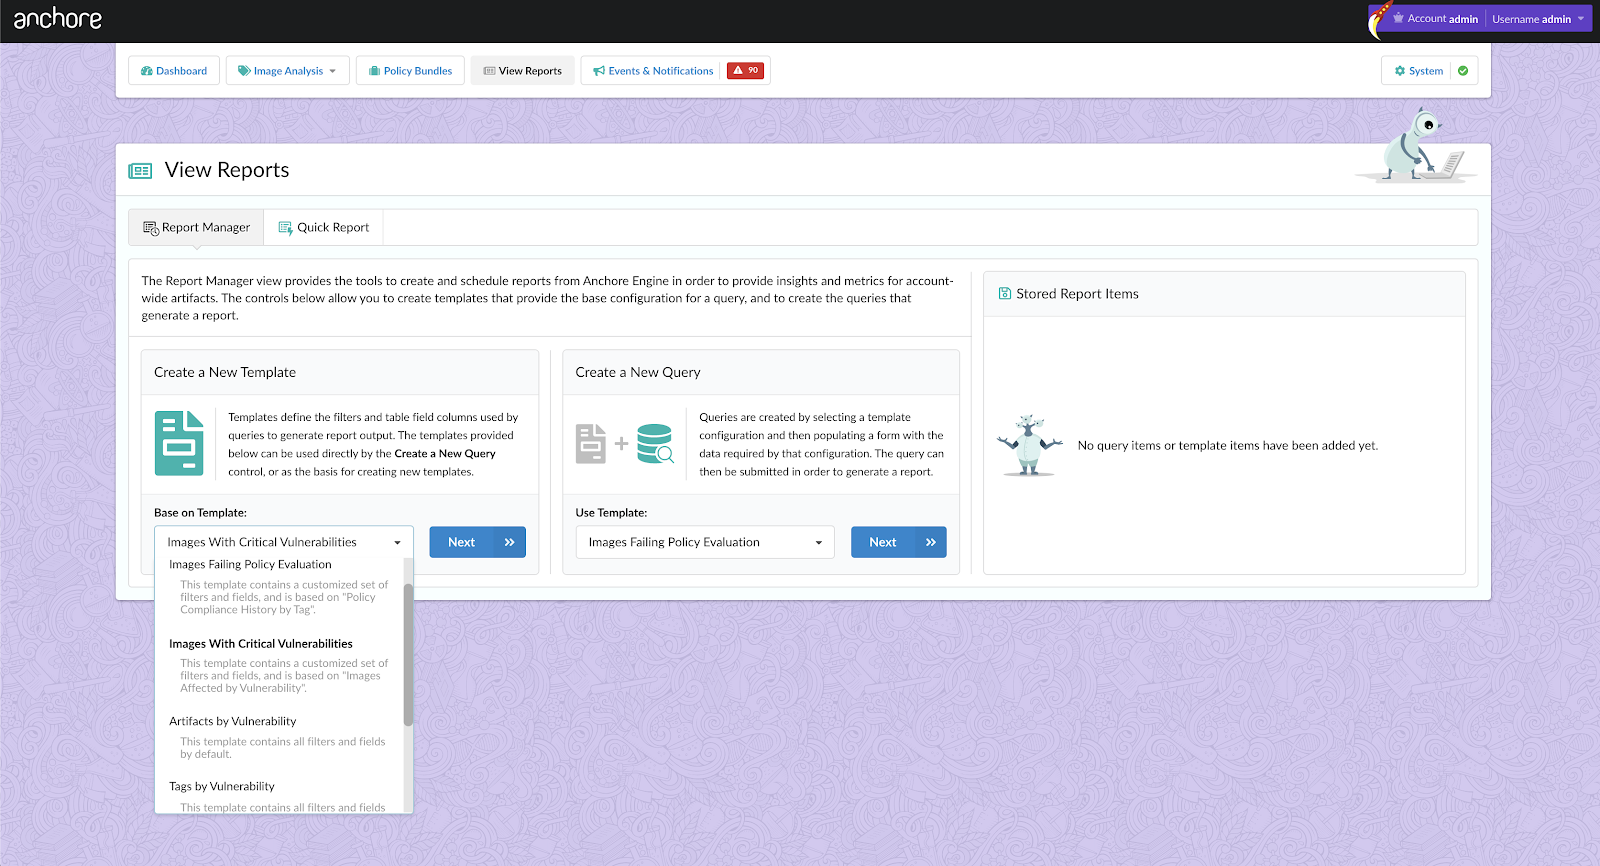
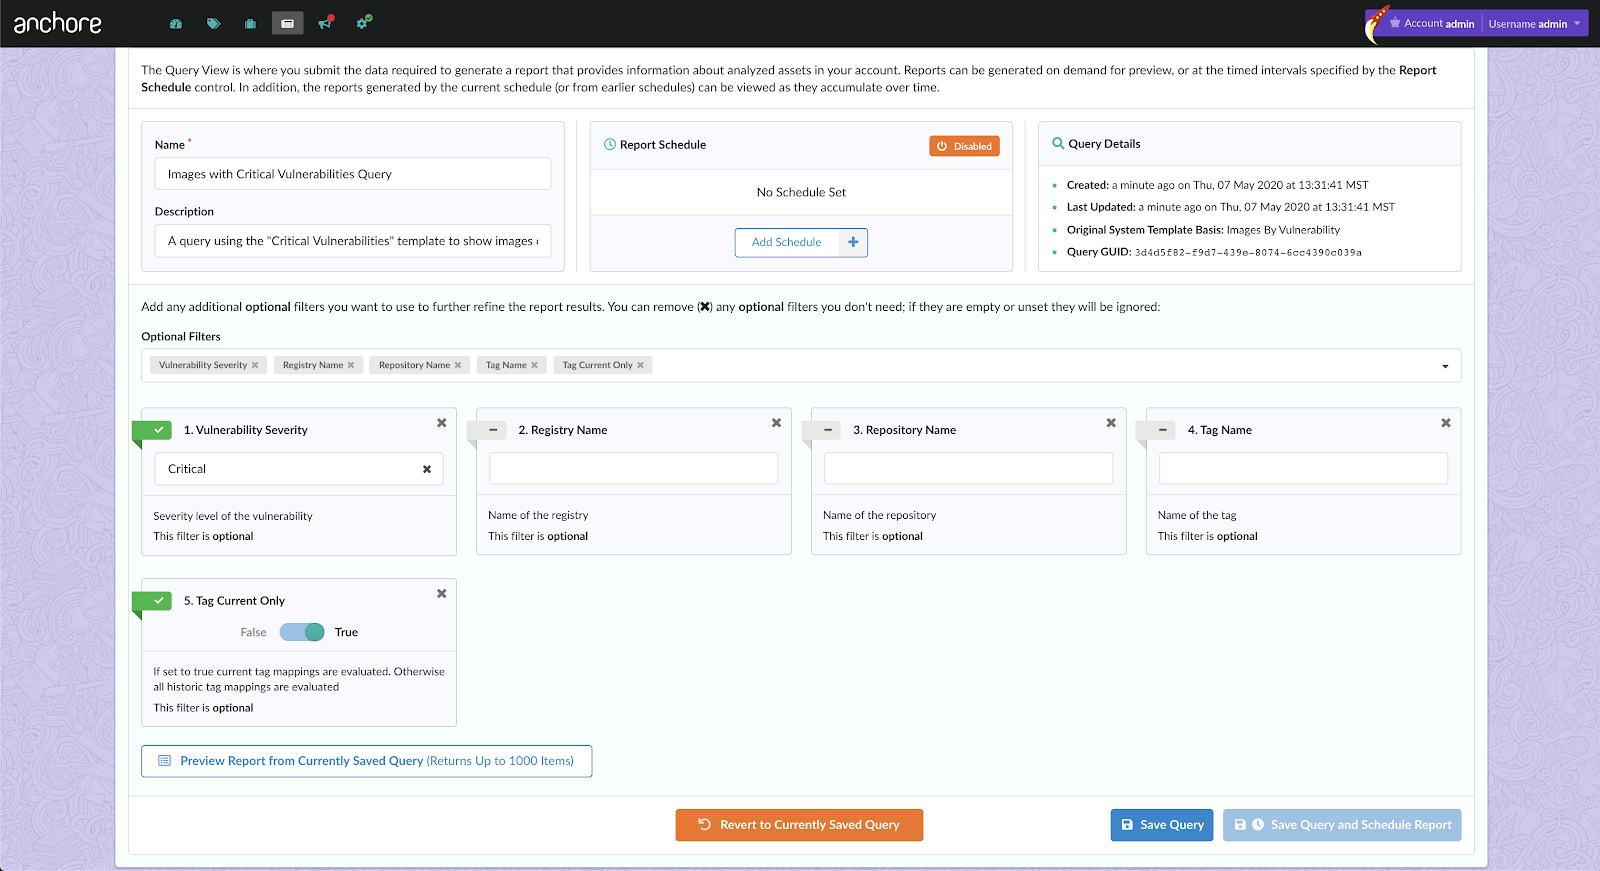
For this example, just the default values will be used, but from the screenshot below, it’s easy to see there are a lot of different options and configurations to customize the report. After adding a name and description, clicking OK will save the template.

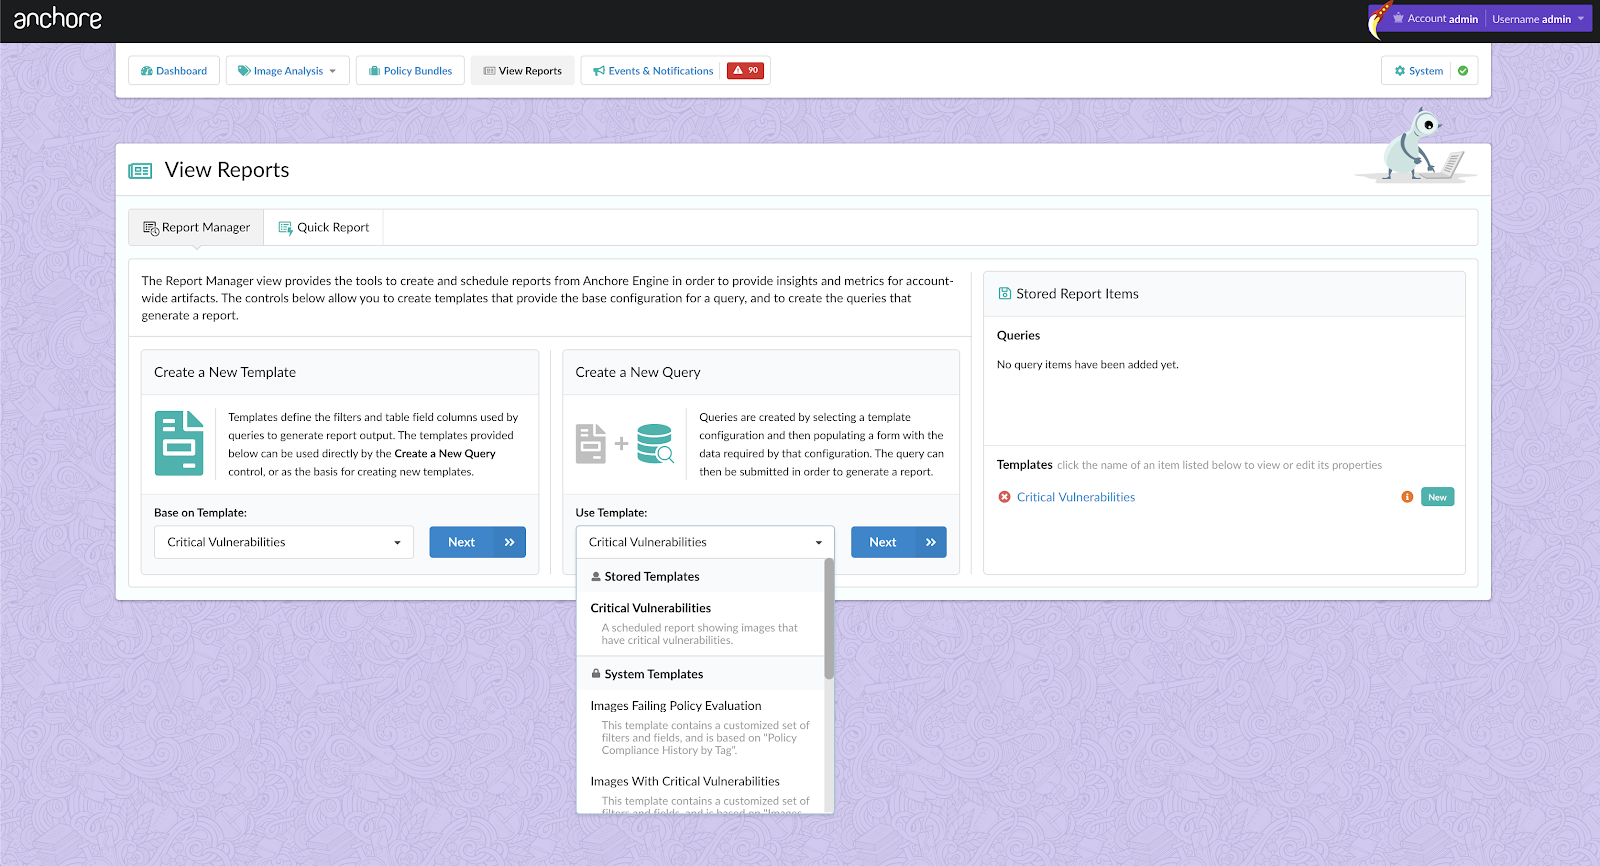
In the screenshot above, the fields allow users to control what data is shown in the results and are displayed from left to right within a report table. To optionally refine the result set returned, filter options can be added or removed, including setting a default value for each entry and specifying if the filter is optional or required. Now that the template has been created, a new scheduled query using it can be created. In the Create a New Query box, the Critical Vulnerabilities template is displayed as an option in the dropdown.
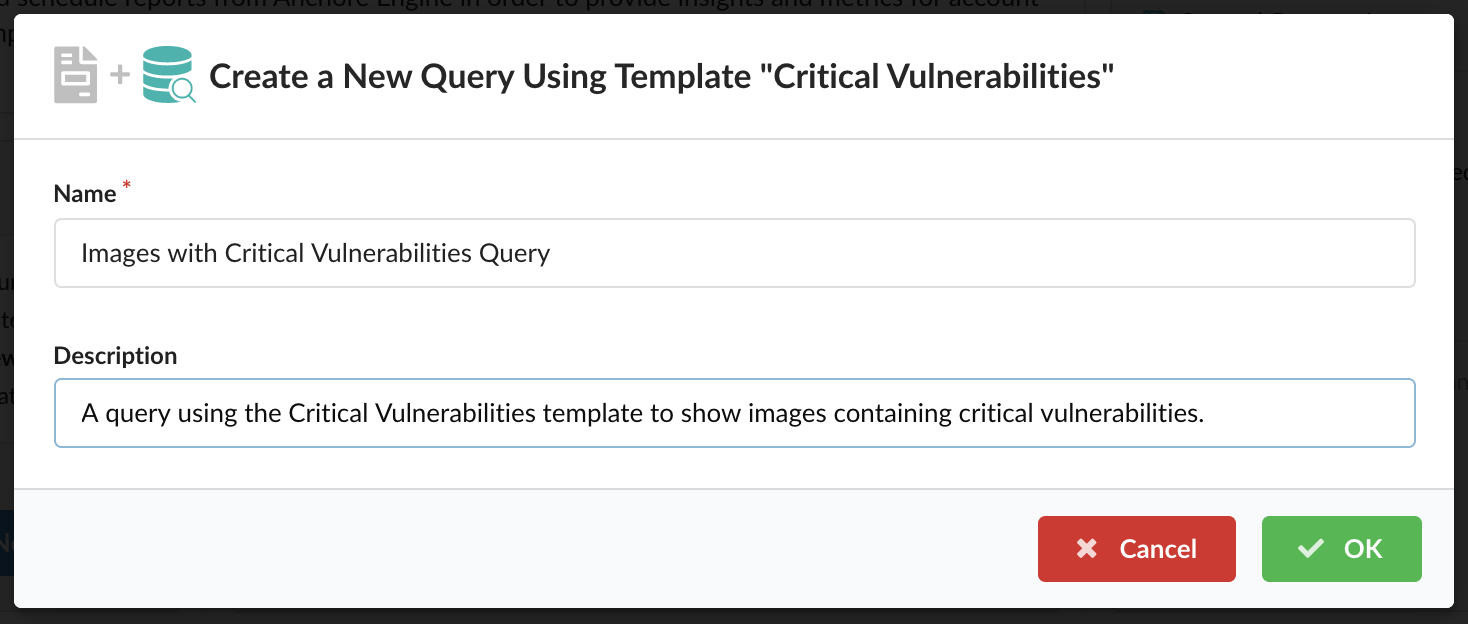
When the Create New Query Using Template window opens, name the query and provide an optional description.
Set any optional filters.
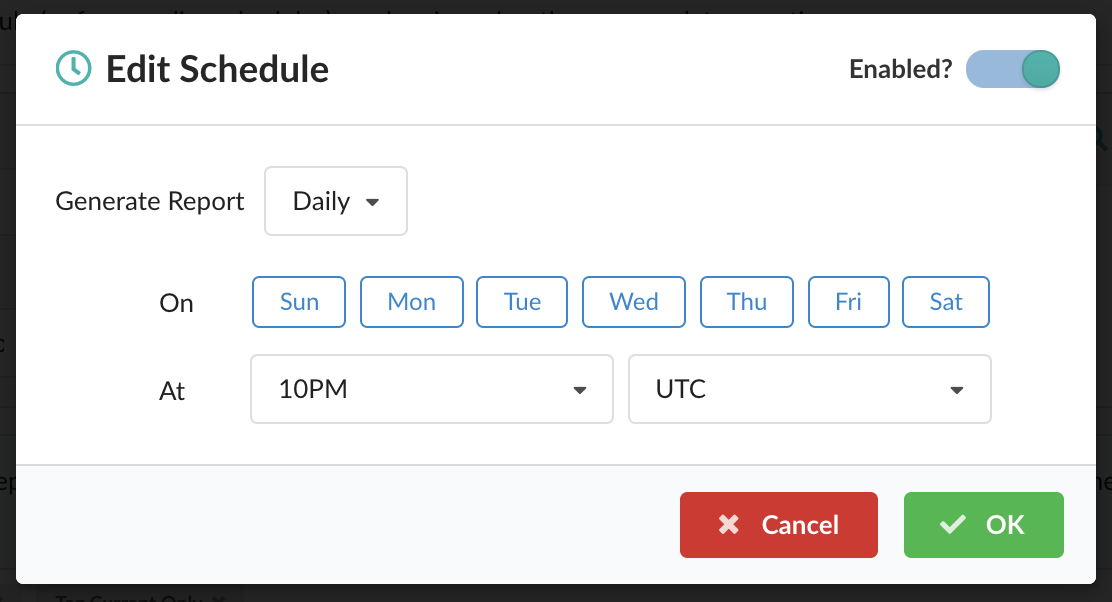
Create a schedule for the report by clicking on Add Schedule. For this example, the report will be generated daily at 10:00 PM UTC time. Toggling the Enabled slider ensures that the report will be generated at the scheduled time; without enabling it, the query can be saved but it won’t automatically execute the report.
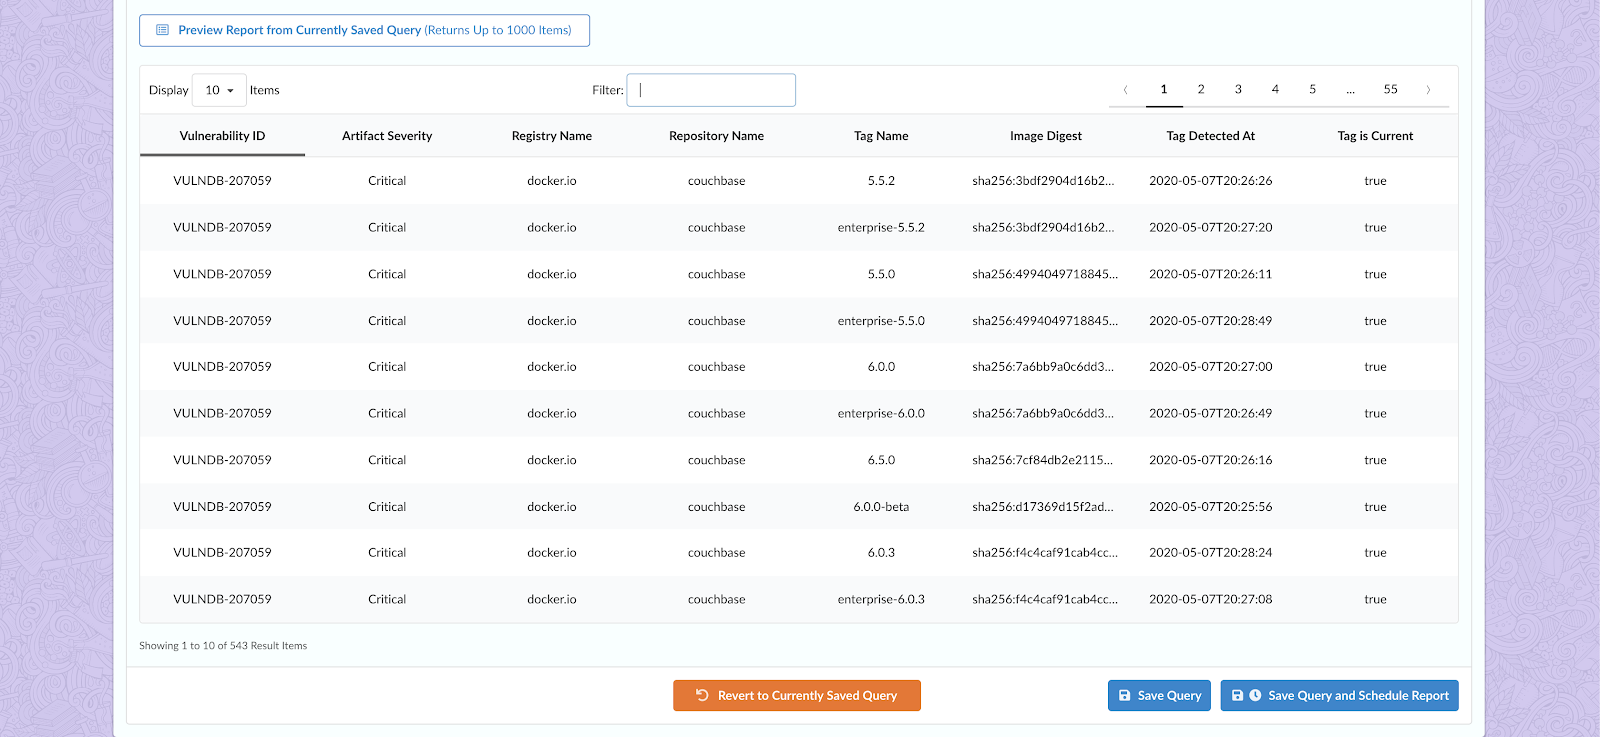
The report can be previewed using the Preview Report from Currently Saved Query button.
Conclusion
By using scheduled reports, users are able to automate analysis reporting for all images across their organization, making it simple to identify images affected and reduce the amount of effort needed to compile the same data. Taking it a step further, users can configure a notification to be triggered when the report is ready using email, GitHub, Jira, Slack, Teams, or a custom webhook. For more information on scheduled reports, take a look at our documentation on Using the Report Manager.
As always, you can view our documentation and installation guides here.