Recent announcements from Atlassian have made several powerful new features of the Bitbucket platform available worldwide – at Anchore, this means that our official Anchore Scan Pipe for Atlassian Bitbucket Pipelines is also now generally available, bringing container image security and compliance scanning ever closer to your Atlassian Bitbucket based automated software delivery systems.
Pipelines enable users to construct automated CI/CD processes that are closely aligned with source code activities, triggering on events like developer pull requests and code commits to automatically generate executable software (such as container images) that is built, tested, verified, and finally released. Many modern CI/CD processes generate container images as the final executable software artifact, which introduces a vector by which new software and configurations are included in the executable that were not present in the source code itself. This introduces potential security and compliance issues that are unique to this step of the build/test/release process – Anchore’s technology focuses on giving users the tools needed to assert flexible security, compliance and best-practice requirements in any container build process as early as possible, which makes the inclusion of Anchore into the Atlassian Bitbucket Pipeline ecosystem a natural fit.
The new Anchore Scan Pipe enables users to quickly and easily add Anchore’s container image security and compliance scanning into existing and new pipelines with just a few lines of YAML. Further, the integration was developed in concert with the availability of Bitbucket’s recently announced Code Insights for Bitbucket Cloud feature, enabling the results of your Anchore scan to be presented natively in the Bitbucket Cloud UI alongside pull requests and commits.
To get started, check out the official Anchore Scan Pipe, or see the following quick run-through demonstrating the addition of an Anchore scan to your existing pipeline.
Step 1: Review your Container Image Building Pipeline
For example, your bitbucket_pipelines.yaml might have a simple step to build a container image similar to the following:
script:
  - export IMAGE_NAME=your_container_repo/your_container_image:$BITBUCKET_COMMIT

  # build the Docker image (this will use the Dockerfile in the root of the repo)
  - docker build -t $IMAGE_NAME -f Dockerfile .

  # push the new Docker image to the Docker registry
  - docker login --username $DOCKER_HUB_USERNAME --password $DOCKER_HUB_PASSWORD
  - docker push $IMAGE_NAME
Step 2: Add Call to Anchore Scan Pipe
Anchore scans container image content, and thus requires that an image is built to be provided as input to the scan. This means that the Anchore Scan Pipe invocation can be placed anywhere between the image build and image push steps. Minimally, only the name of the newly built image must be passed to the pipe.
script:
  - export IMAGE_NAME=your_container_repo/your_container_image:$BITBUCKET_COMMIT

  # build the Docker image (this will use the Dockerfile in the root of the repo)
  - docker build -t $IMAGE_NAME -f Dockerfile .

  # run the anchore scan pipe
  - pipe: anchore/anchore-scan:0.1.2
  variables:
    IMAGE_NAME: $IMAGE_NAME

  # push the new Docker image to the Docker registry
  - docker login --username $DOCKER_HUB_USERNAME --password $DOCKER_HUB_PASSWORD
  - docker push $IMAGE_NAME
When the pipe executes, it will perform a full software package vulnerability scan, as well as an Anchore policy evaluation using a set of checks that are included by default.
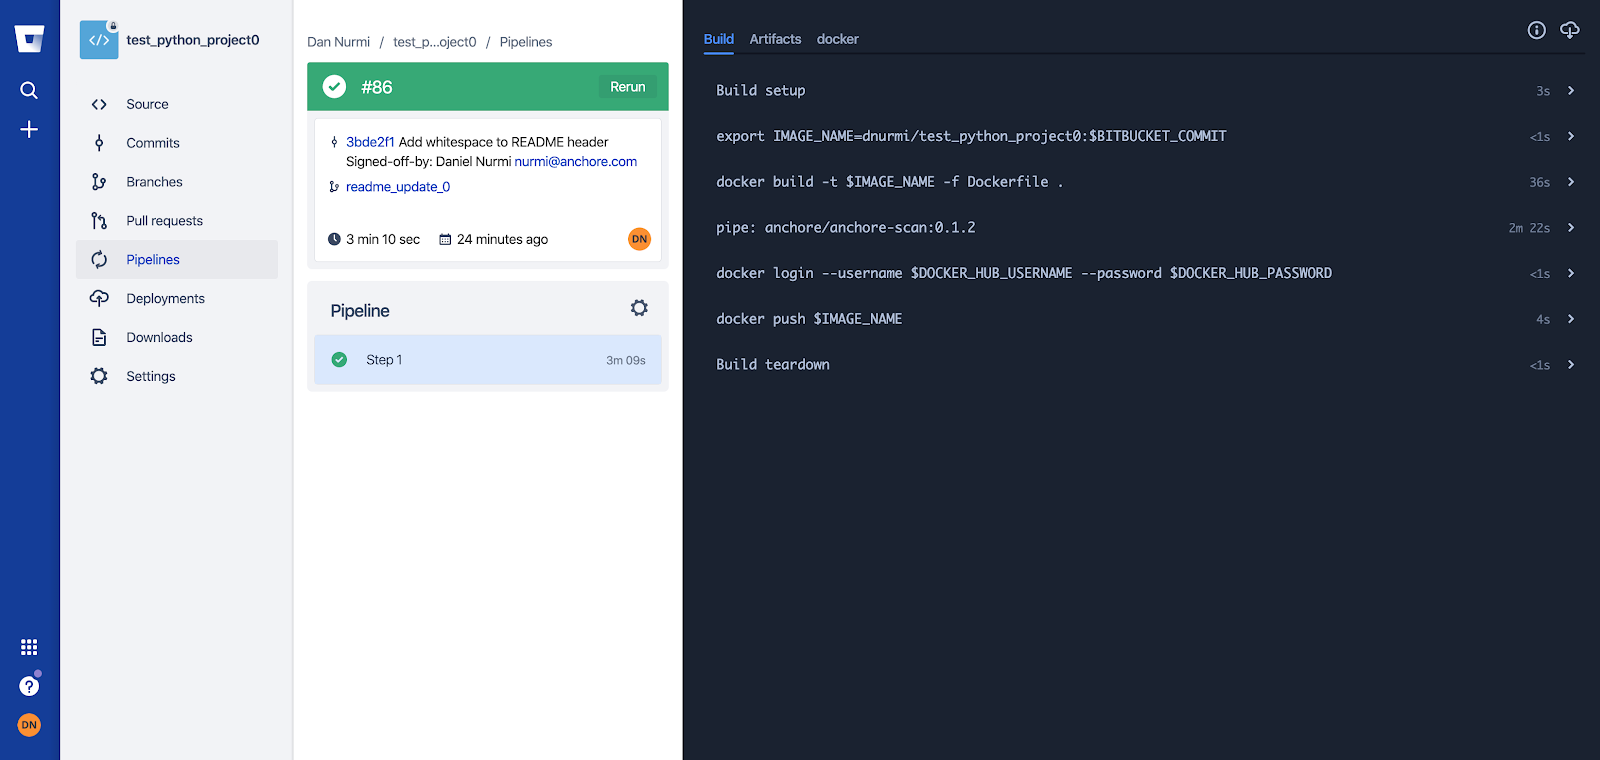
Step 3: Run the pipeline as usual, and observe the Anchore Scan Pipe executing
In the native Bitbucket Pipeline UI, you should now see the Anchore Scan Pipe invoked when the above step is executed.
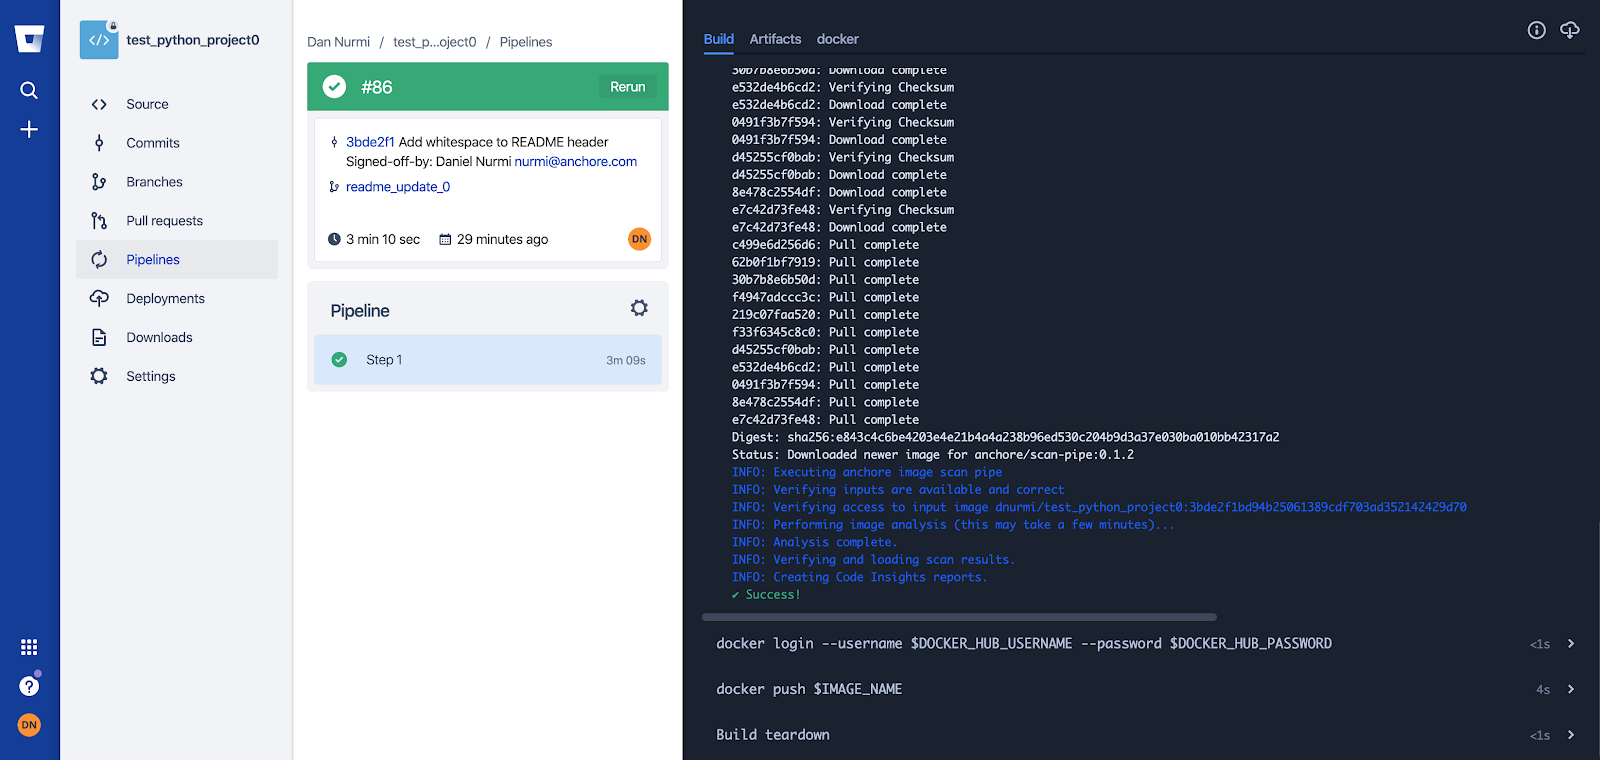
Expanding the pipe dropdown will reveal more messages showing the Anchore Scan Pipe progress.
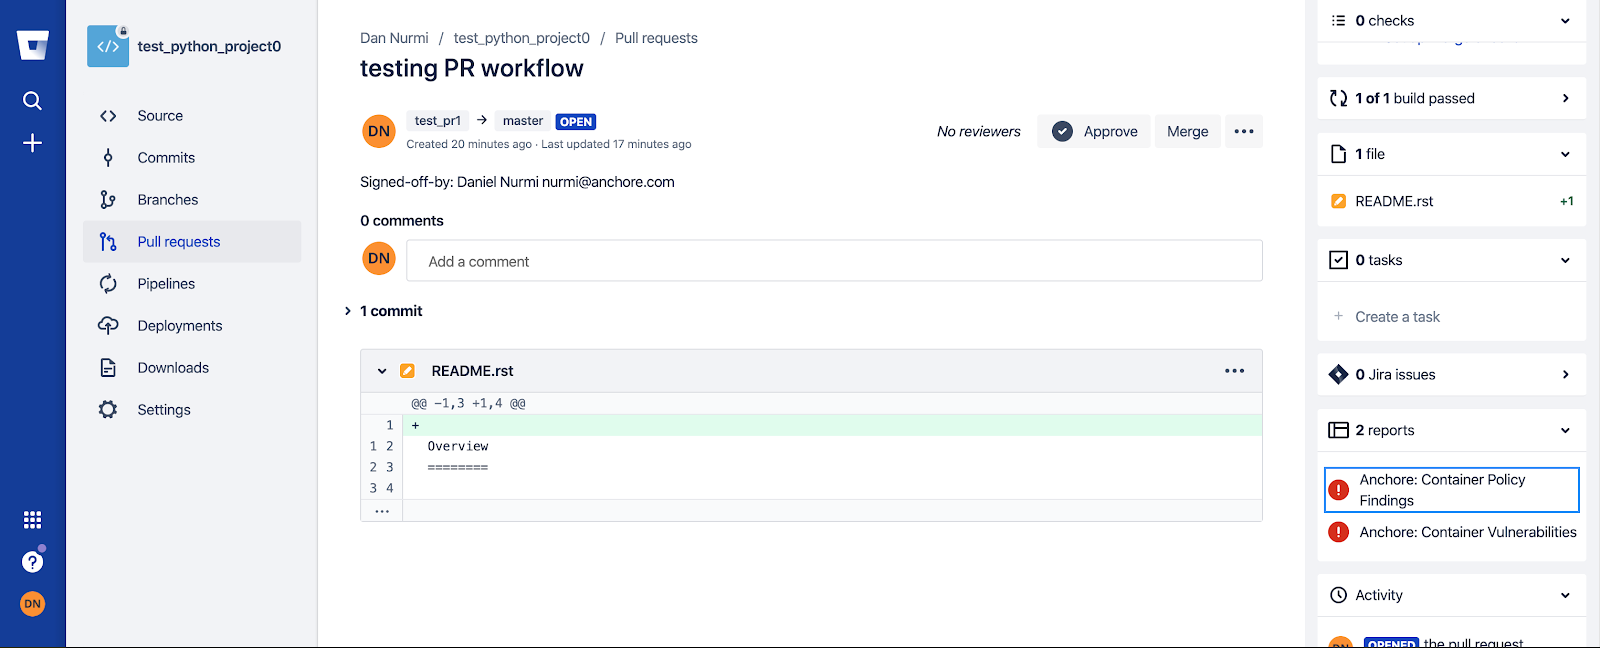
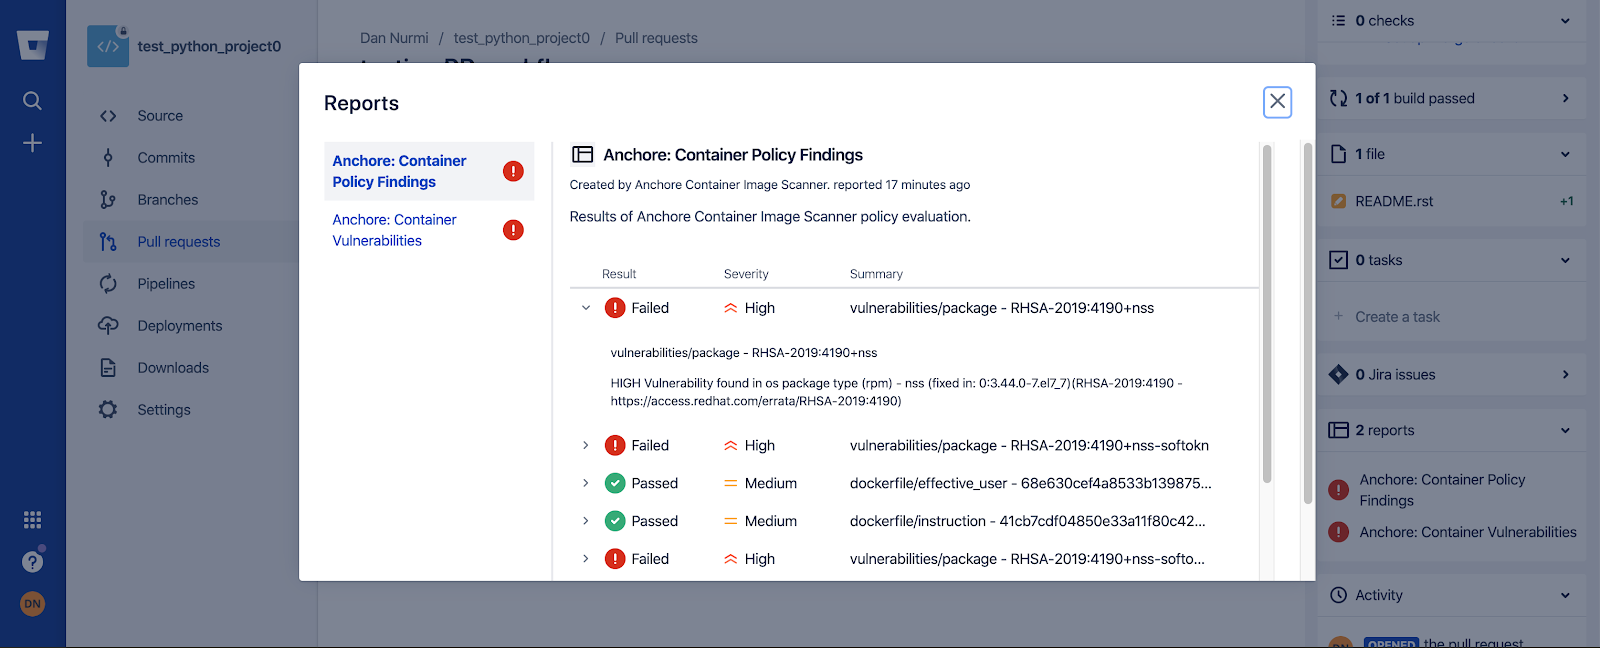
Step 4: Inspect scan results via Code Insights Report
Now that the pipe has executed against your commit, the last step is to review the results of the Anchore Scan Pipe, via the native Code Insights Reports section next to PRs and Commits. The Anchore scan will generate two reports (Vulnerabilities, Policy Evaluation) which can be toggled on and off via pipe configuration – by default, they’re both enabled:

Step 5: Tune your policy and scan options
Anchore has always included very flexible tooling to generate results based on your specifications. The Anchore Scan Pipe exposes this flexibility by enabling you to not only rely on the default Anchore policy but also specify your own by storing your custom policy document alongside your code, to have customized policies per repository. Click here to learn more about the breadth and depth of Anchore’s policy checking capabilities.
For more information: