Achieve container vulnerability scanning nirvana in your CI pipeline with Anchore Enterprise and your preferred CI platform, whether it’s GitHub, GitLab, or Jenkins. Identifying vulnerabilities, security issues, and compliance policy failures early in the software development process is crucial. It’s certainly preferable to uncover these issues during development rather than having them discovered by a customer or during an external audit.
Early detection of vulnerabilities ensures that security and compliance are integrated into your development workflow, reducing the risk of breaches and compliance violations. This proactive approach not only protects your software but also saves time and resources by addressing issues before they escalate.
Enabling CI Integration
At a high level, the steps to connect any CI platform to Enterprise are broadly the same, with implementation details differing between each vendor.
- Enable network connectivity between CI and Enterprise
- Capture Enterprise configuration for AnchoreCTL
- Craft an automation script to operate after the build process
- Install AnchoreCTL
- Capture built container details
- Use AnchoreCTL to submit container details to Enterprise
Once SBOM generation is integrated into the CI pipeline, and they’re submitted to Anchore Enterprise, the following features can quickly be leveraged:
- Known vulnerabilities with severity, and fix availability
- Search for accidental ‘secrets’ sharing such as private API keys
- Scan for malware like trojans and viruses
- Policy enforcement to comply with standards like FedRAMP, CISA and DISA
- Remediation by notifying developers and other agents via standard tools like GitHub issues, JIRA, and Slack
- Scheduled reporting on container insights
CI Integration by Example
Taking GitHub Actions as an example, we can outline the requirements and settings to get up and running with automated SBOM generation and vulnerability management.
Network connectivity
AnchoreCTL uses port 8228 for communication with the Anchore Enterprise SBOM ingest and management API. Ensure the Anchore Enterprise host, where this is configured, is accessible on that port from GitHub. This is site specific and may require firewall, VLAN and other site-specific changes.
Required configuration
AnchoreCTL requires only three environment variables, typically set as GitHub secrets.
ANCHORECTL_URL– the URL of the Anchore Enterprise API endpoint. e.g. http://anchore-enterprise.example.com:8228ANCHORECTL_USERNAME– the user account in Anchore Enterprise, that theanchorectlwill authenticate usingANCHORECTL_PASSWORD– the password for the account, set on the Anchore Enterprise instance
On the GitHub repository go to Settings -> Secrets and Variables -> Actions.
Under the ‘Variables’ tab, add ANCHORECTL_URL & ANCHORECTL_USERNAME, and set their values. In the ‘Secrets’ tab, add ANCHORECTL_PASSWORD and set the value.
Automation script
Below are the sample snippets from a GitHub action that should be placed in the repository under .github/workflows to enable SBOM generation in Anchore Enterprise. In this example,
First, our action needs a name:
name: Anchore Enterprise Centralized ScanPick one or more from this next section, depending on when you require the action to be triggered. It could be based on pushes to the main or other named branches, on a timed schedule, or manually.
Commonly when configuring an action for the first time, manual triggering is used until proven working, then timed or branch automation is enabled later.
on:
  ## Action runs on a push the branches listed
  push:
    branches:
      - main
  ## Action runs on a regular schedule
  schedule:
      ## Run at midnight every day
    - cron: '0 0 * * *'
  ## Action runs on demand build
  workflow_dispatch:
    inputs:
      mode:
        description: 'On-Demand Build'
In the env section we pass in the settings gathered and configured inside the GitHub web UI earlier. Additionally the optional ANCHORECTL_FAIL_BASED_ON_RESULTS boolean defines (if true) whether we want the the entire action to be failed based on scan results. This may be desirable, to block further processing if any vulnerabilities, secrets or malware are identified.
env:
ANCHORECTL_URL: ${{ vars.ANCHORECTL_URL }}
ANCHORECTL_USERNAME: ${{ vars.ANCHORECTL_USERNAME }}
ANCHORECTL_PASSWORD: ${{ secrets.ANCHORECTL_PASSWORD }}
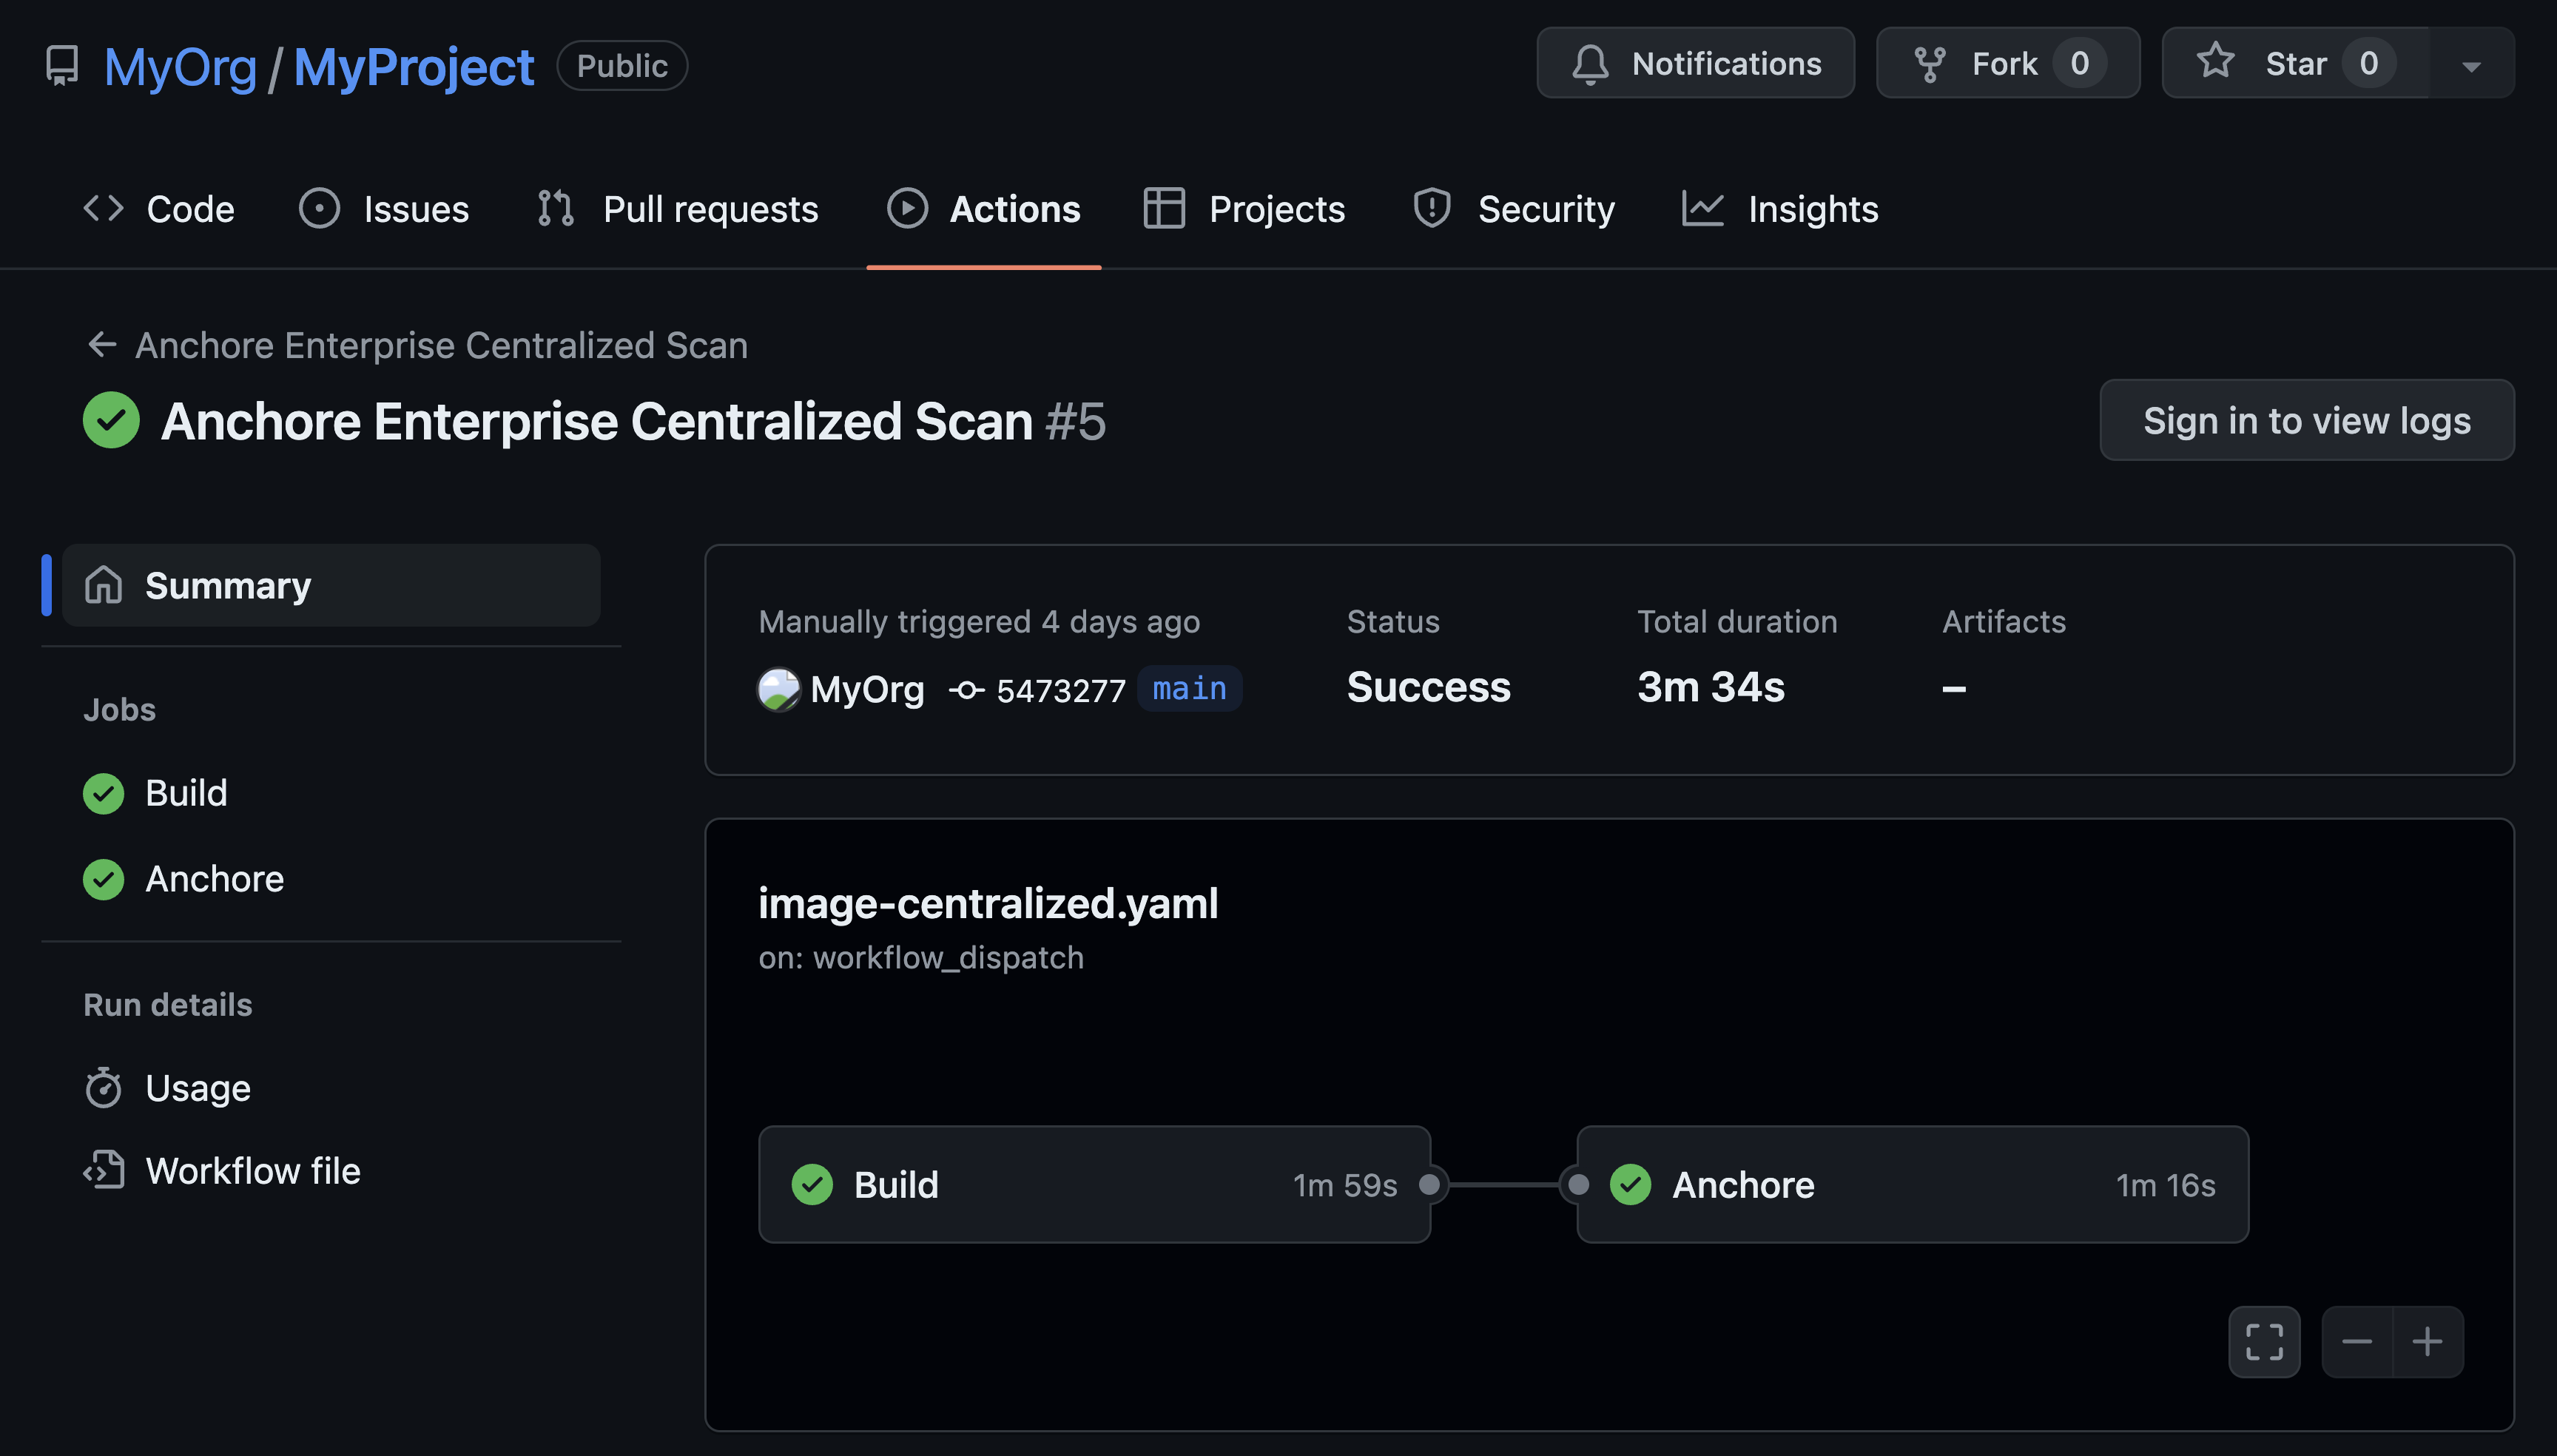
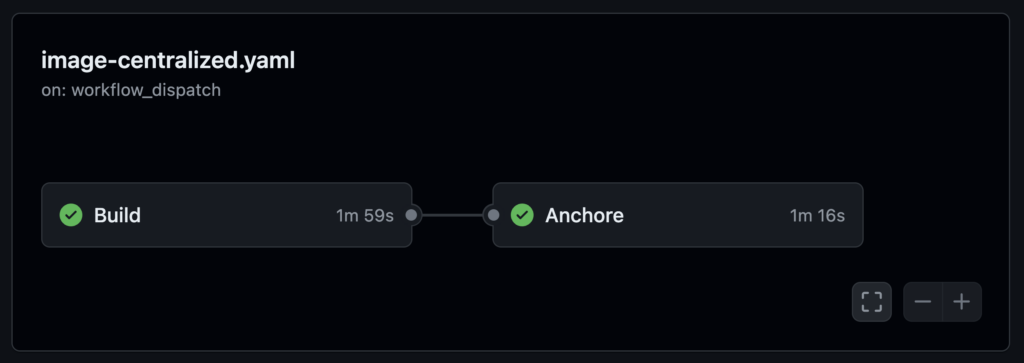
ANCHORECTL_FAIL_BASED_ON_RESULTS: falseNow we start the actual body of the action, which comprises two jobs, ‘Build’ and ‘Anchore’. The ‘Build’ example here will use externally defined steps to checkout the code in the repo and build a container using docker, then push the resulting image to the container registry. In this case we build and publish to the GitHub Container Registry (ghcr), however, we could publish elsewhere.
jobs:

  Build:
    runs-on: ubuntu-latest
    steps:

    - name: "Set IMAGE environmental variables"
      run: |
        echo "IMAGE=${REGISTRY}/${GITHUB_REPOSITORY}:${GITHUB_REF_NAME}" >> $GITHUB_ENV

    - name: Checkout Code
      uses: actions/checkout@v3

    - name: Log in to the Container registry
      uses: docker/login-action@v2
      with:
        registry: ${{ env.REGISTRY }}
        username: ${{ github.actor }}
        password: ${{ secrets.GITHUB_TOKEN }}

    - name: Set up Docker Buildx
      uses: docker/setup-buildx-action@v2

    - name: build local container
      uses: docker/build-push-action@v3
      with:
        tags: ${{ env.IMAGE }}
        push: true
        load: false
The next job actually generates the SBOM, let’s break this down. First, the usualy boilerplate, but note this job depends on the previous ‘Build’ job having already run.
  Anchore:
    runs-on: ubuntu-latest
    needs: Build

    steps:
The same registry settings are used here as were used in the ‘Build’ job above, then we checkout the code onto the action runner. The IMAGE variable will be used by the anchorectl command later to submit into Anchore Enterprise.
    - name: "Set IMAGE environment variables"
      run: |
        echo "IMAGE=${REGISTRY}/${GITHUB_REPOSITORY}:${GITHUB_REF_NAME}" >> $GITHUB_ENV

    - name: Checkout Code
      uses: actions/checkout@v3
Installing the AnchoreCTL binary inside the action runner is required to send the request to the Anchore Enterprise API. Note the version number specified as the past parameter, should match the version of Enterprise.
    - name: Install Latest anchorectl Binary
      run: |
        curl -sSfL https://anchorectl-releases.anchore.io/anchorectl/install.sh | sh -s -- -b ${HOME}/.local/bin v5.7.0
        export PATH="${HOME}/.local/bin/:${PATH}"
The Connectivity check is a good way to ensure anchorectl is installed correctly, and configured to connect to the right Anchore Enterprise instance.
    - name: Connectivity Check
      run: |
        anchorectl version
        anchorectl system status
        anchorectl feed list
Now we actually queue the image up for scanning by our Enterprise instance. Note the use of --wait to ensure the GitHub Action pauses until the backend Enterprise instance completes the scan. Otherwise the next steps would likely fail, as the scan would not yet be complete.
    - name: Queue Image for Scanning by Anchore Enterprise
      run: |
        anchorectl image add --no-auto-subscribe --wait --dockerfile ./Dockerfile --force ${IMAGE}
Once the backend Anchore Enterprise has completed the vulnerability, malware, and secrets scan, we use anchorectl to pull the list of vulnerabilities and display them as a table. This can be viewed in the GitHub Action log, if required.
    - name: Pull Vulnerability List
      run: |
        anchorectl image vulnerabilities ${IMAGE}
Finally, the image check will pull down the results of the policy compliance as defined in your Anchore Enterprise. This will likely be a significantly shorter output than the full vulnerability list, depending on your policy bundle.
If the environment variable ANCHORECTL_FAIL_BASED_ON_RESULTS was set true earlier in the action, or -f is added to the command below, the action will return as a ‘failed’ run.
    - name: Pull Policy Evaluation
      run: |
        anchorectl image check --detail ${IMAGE}
That’s everything. If configured correctly, the action will run as required, and directly leverage the vulnerability, malware and secrets scanning of Anchore Enterprise.
Not just GitHub
While the example above is clearly GitHub specific, a similar configuration can be used in GitLab pipelines, Jenkins, or indeed any CI system that supports arbitrary shell scripts in automation.
Conclusion
By integrating Anchore Enterprise into your CI pipeline, you can achieve a higher level of security and compliance for your software development process. Automating vulnerability scanning and SBOM management ensures that your software is secure, compliant, and ready for deployment.
Automate your SBOM management with Anchore Enterprise. Get instant access with a 15-day free trial.